
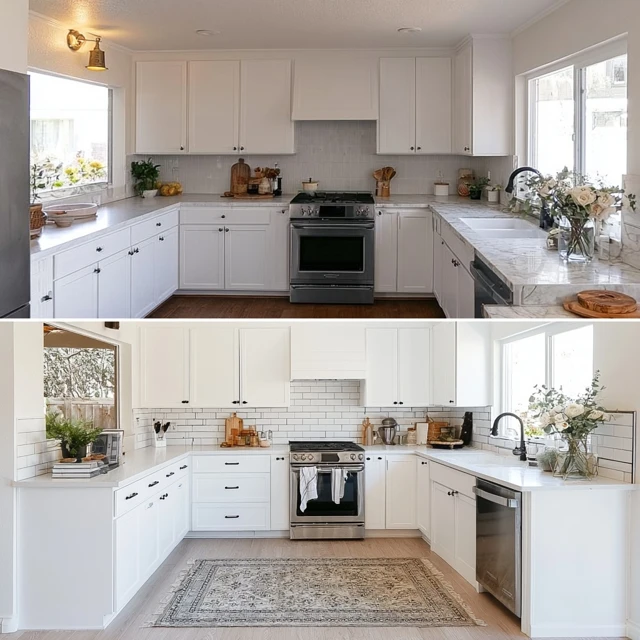
I love the clean, bright look of white cabinets. But pairing them with a stunning countertop often feels out of reach when the budget is tight. That’s why I was determined to find a way to get that $5,000 look for just $50. And I did. The secret is not in the material but in the method.

This isn’t about installing actual stone. It’s about transforming a plain laminate or even a worn Formica countertop into something that mimics marble, soapstone, or concrete. The key is in the prep, the paint layers, and the finish. Let me walk you through the exact technique.
Why This Works with White Cabinets
White cabinets act as a neutral canvas. They reflect light and make any countertop color or pattern stand out. A busy faux marble pattern on a dark base would look chaotic. But against white, it looks deliberate, like a high-end slab. The contrast is what sells the illusion.
When you choose your paint colors, think about the undertones. A warm white cabinet (with a hint of cream) pairs well with a gray-veined marble look. A cool white (blue undertone) works beautifully with a true white marble or a dark charcoal soapstone finish. Match the vibe.
The $50 Supply List
You probably already have some of these. Here’s what you need:
- Laminate countertop – If you’re starting from scratch, buy a basic white or light gray laminate sheet from a home improvement store. Under $30 for a standard kitchen size.
- Bonding primer – This is non-negotiable. Laminate is slick. Regular paint will peel. A bonding primer like Zinsser BIN or a similar shellac-based primer costs about $10.
- Paint – Two colors: a base color (off-white, light gray, or dark charcoal) and a vein color (darker gray, black, or brown). Use high-quality satin or semi-gloss interior latex. One sample pot of each is enough. Under $10 total.
- Feather or fine brush – For veining. A turkey feather works best, but a small artist brush is fine. Under $2.
- Sponge – A natural sea sponge for softening the veins. Under $3.
- Water-based polyurethane – For sealing. A small can is around $8.
- Sandpaper – Fine grit (220). And painter’s tape, drop cloths, and a foam roller.
Total: around $50. Maybe $55 if you need the laminate sheet. Still a steal.
The Step-by-Step Technique
Step 1: Prep the Surface
Clean the countertop thoroughly with a degreaser. Any grease or residue will ruin the adhesion. Then lightly sand the entire surface with fine-grit sandpaper. Wipe away the dust. This gives the primer something to grip.
If you’re working with an existing countertop, fill any chips or gouges with wood filler or spackle, sand smooth, and then proceed.
Step 2: Apply Bonding Primer
Roll on a thin, even coat of bonding primer. Use a foam roller for a smooth finish. Let it dry completely, usually 1-2 hours. Lightly sand again with 220-grit sandpaper to remove any brush marks or roller texture. Wipe clean.
Step 3: Paint the Base Coat
Roll on your base color. Two thin coats are better than one thick coat. Let each coat dry fully. The base coat should be smooth and even. This is the color that will show through the veining, so take your time.
Step 4: Create the Veins
This is where the magic happens. Pour a small amount of your vein color paint onto a paper plate. Dip the tip of the feather or brush into the paint. Lightly drag it across the countertop in long, sweeping lines. Think of natural marble – veins are not straight or uniform. They branch and taper.
Use the sponge to dab and soften the edges of the veins. This blends the colors and makes it look organic. Work in small sections. Don’t overthink it. Imperfection is your friend here.
For a soapstone look, use a dark gray base with black veins. For marble, use an off-white base with gray or taupe veins. You can also add a few tiny splatters of a third color (like a pale gold) for depth.
Step 5: Seal It
Once the veining is dry (wait at least 4 hours), apply the first coat of water-based polyurethane. Use a foam brush or roller. Let it dry, then lightly sand with 400-grit sandpaper. Apply a second coat, sand again, and a third coat for durability. This final layer is what makes it look like a real stone countertop.
Let it cure for 48 hours before using the countertop. Avoid placing hot pans directly on it for at least a week. Use cutting boards and trivets always.
Common Mistakes to Avoid
- Skipping the primer – The paint will peel within weeks. Don’t do it.
- Using too much paint on the feather – Less is more. You can always add more veining, but you can’t remove a glob.
- Not sanding between sealer coats – This creates a smooth, glass-like finish. Skipping it leaves a rough texture.
- Rushing the cure time – If you put heavy objects on it too soon, the sealer will dent. Patience pays off.
Adapting for Different Styles
This technique works for any countertop shape or size. For a butcher block island, you can paint the perimeter countertops and leave the island natural. For a small galley kitchen, the veining can be more dramatic because there’s less surface area.
If you have kids, use a satin or semi-gloss polyurethane – it’s easier to wipe clean. For a rustic cabin kitchen, try a warm gray base with brown veins to mimic soapstone. The method is the same, just the colors change.
Safety Notes
Work in a well-ventilated area when using primer and polyurethane. Wear a mask if you’re sensitive to fumes. Keep paint and solvents away from heat sources and open flames. If your kitchen has a gas stove, turn off the pilot light while working.
Takeaway
A $50 countertop that looks like $5,000 is absolutely possible. It’s not about the material – it’s about the technique. Prep well, paint deliberately, and seal thoroughly. White cabinets will do the rest of the work. You’ll walk into your kitchen and do a double-take. And that feeling? Worth every penny.
Frequently Asked Questions
Can I really make a $50 countertop look like marble?
Yes, with the right supplies and technique. Use a high-quality bonding primer, two-tone base paint, and a feather or fine brush for veining. Seal with multiple coats of water-based polyurethane for durability.
What supplies do I need for the $50 countertop makeover?
You’ll need a laminate countertop (or refinish existing), bonding primer, paint in two shades (base and vein color), a feather or sponge, painter’s tape, sandpaper, and a water-based polyurethane sealer. Total cost around $50.
How long does the painted countertop last?
With proper preparation and sealing, a painted laminate countertop can last 2-3 years with normal use. Avoid cutting directly on it and use trivets for hot pans.
Will this work with white cabinets?
Absolutely. White cabinets create a crisp backdrop that makes any countertop pop. The contrast helps the faux finish look more intentional and high-end.
Is this project safe for a rental kitchen?
Yes, because it’s a reversible cosmetic upgrade. The paint can be removed with a strong solvent, or you can simply paint over it when you move out. Always check your lease first.