
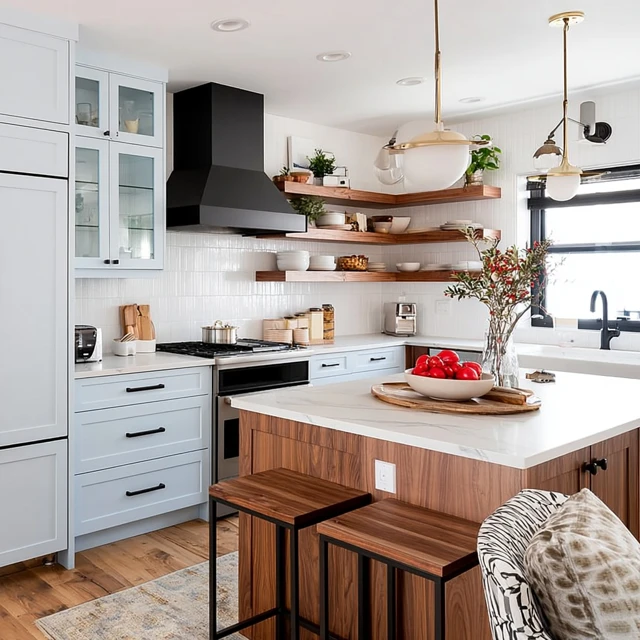
I walked into a friend’s kitchen last month and stopped cold. The same oak cabinets, the same fluorescent light box, the same beige tile backsplash I’d seen a hundred times. But this time the cabinets were a soft sage green, the hardware was matte black, and the light fixture was a warm brass pendant. It looked like a completely different room—and she did it all in one weekend.

That’s the thing about a kitchen remodel before and after. You don’t need a contractor or a huge budget. You just need a plan, the right tools, and two days. Here are five transformations anyone can pull off by Monday morning.
1. Paint Your Cabinets (Not Just the Doors)
The single biggest impact for the least money: paint. But don’t make the rookie mistake of only painting the doors. The frames, the sides, the toe kick—everything visible needs the same treatment. I always remove the doors and label them with painter’s tape (top left, bottom right, etc.) so rehanging is a breeze. Use a high-adhesion primer, then two coats of cabinet-grade paint. Pro tip: a foam roller gives that factory-smooth finish, not a brush. Let each coat dry fully—overnight if you can. The before and after is dramatic: dated wood becomes modern and crisp.
2. Swap the Hardware (It’s a Ten-Minute Miracle)
New knobs and pulls change the entire feel of a kitchen, and you can do it while the paint dries. Measure the center-to-center distance of existing holes—standard is 3 inches or 96mm. Stick to the same spacing if you don’t want to drill new holes. For a quick weekend update, choose a finish that contrasts with your cabinet color: matte black on white, brass on navy, or satin nickel on gray. The tactile difference is immediate—your hand knows when something is quality.
3. Add a Peel-and-Stick Backsplash (No Grout Needed)
Real tile is messy and time-consuming. For a weekend project, peel-and-stick backsplash panels are the secret weapon. They come in subway tile, herringbone, even marble looks. The key is surface prep: clean the wall with rubbing alcohol, let it dry, then apply starting from the countertop and working up. Press firmly with a roller or a clean cloth. Cut around outlets with a utility knife, but turn off the breaker first. One afternoon, and your kitchen remodel before and after includes a backsplash that looks like it was always there.
4. Change the Light Fixture (It’s Safer Than You Think)
A builder-grade boob light or fluorescent box kills any aesthetic. Replacing a fixture is straightforward if the wiring is the same type. Turn off power at the breaker, confirm with a voltage tester, then match the wires: black to black, white to white, ground to ground. A pendant or a flush-mount drum shade can transform the room’s mood instantly. For a warm glow, use dimmable LED bulbs at 2700K. Bonus: better lighting makes your new backsplash and cabinets pop.
5. Create a Coffee Station or Bar Cart (Instant Focal Point)
Sometimes the best before and after isn’t structural—it’s organizational. Clear a section of counter, add a small shelf above, and corral your coffee maker, mugs, and syrups on a tray. Use a tiered stand for spices or tea bags. The visual difference is a cluttered counter becomes a curated corner. I’ve seen this trick turn a cramped galley kitchen into a space that feels intentional. It costs under $50 and takes an hour.
The Takeaway
A kitchen remodel before and after doesn’t require demolition. Paint, hardware, backsplash, lighting, and a focused zone—that’s your weekend. Each step builds on the last, and by Sunday night, you’ll have a kitchen that feels new. The best part? You did it yourself.
Frequently Asked Questions
Can I really remodel my kitchen in one weekend?
Yes, if you focus on cosmetic changes like painting cabinets, swapping hardware, adding a backsplash, or updating lighting. Avoid plumbing or electrical work if you’re not experienced.
What tools do I need for a weekend kitchen remodel?
Basic tools: screwdriver, paintbrushes and rollers, painter’s tape, level, measuring tape, drill. For backsplash, add tile cutter, notched trowel, and grout float.
Do I need to sand cabinets before painting?
Yes, light sanding with 120-grit sandpaper helps the primer and paint adhere. Clean thoroughly with a degreaser first.
What color should I paint my kitchen cabinets?
White, soft gray, or navy blue are classic choices that increase resale value. Stick to matte or satin finishes for best durability.
How do I choose new cabinet hardware?
Match the finish to your faucet and lighting. Brushed brass, matte black, and satin nickel are versatile. Measure existing holes to avoid drilling new ones.